Spray Foam Insulation Cost Guide: What You'll Actually Pay in 2026

If you're trying to figure out what spray foam insulation actually costs, you've probably already noticed the problem: every source gives you a different number, and almost nobody breaks it down in a way you can actually use to budget a real project. Manufacturers quote material cost. Big-box retailers quote DIY kits that don't reflect professional installation. And a lot of contractor websites skip pricing altogether and just ask you to call for a quote.
This guide is built to fill that gap. We'll walk through what spray foam insulation, blown-in insulation, and batt insulation commonly cost in 2026 by material type, by room or area of the house, what a minimum job fee typically looks like, how DIY pricing really compares to hiring a pro once you account for performance, the factors that move your price up or down, and what to know about rebates and the federal tax credit before you budget. Every number in this guide is a general, illustrative range meant to help you plan — not a quote. The only way to get an exact number for your home is a proper on-site or virtual estimate, and we'll tell you how to get one that's actually accurate at the end.
What determines the cost of a spray foam insulation project
Before we get into numbers, it helps to understand what you're actually paying for, because spray foam pricing works differently than a lot of other home improvement costs. You're not just buying a material — you're buying a two-part chemical product (an isocyanate and a resin/polyol blend) that reacts and expands on-site, applied by a technician wearing protective equipment, using calibrated proportioning equipment that has to be maintained and set correctly for the specific formulation being sprayed. That's a meaningfully different cost structure than rolling out a fiberglass batt, and it's a big part of why spray foam commonly costs more per square foot than traditional insulation materials — while also doing more per square foot, since it insulates and air-seals in a single application.
In practice, the final number on your invoice is a function of five things working together: the type of foam used, the square footage and depth (thickness) required to hit your target R-value, how accessible the space is, whether any old insulation needs to be removed first, and local labor rates. We'll unpack each of those below, but the short version is that two homes of the same size can land on very different price tags depending on how those five factors line up.
Cost by insulation type
Here's how the main insulation materials typically compare on a cost-per-square-foot basis. These are commonly cited industry ranges meant to orient your expectations — actual pricing varies by region, contractor, and project specifics.
Open-cell spray foam
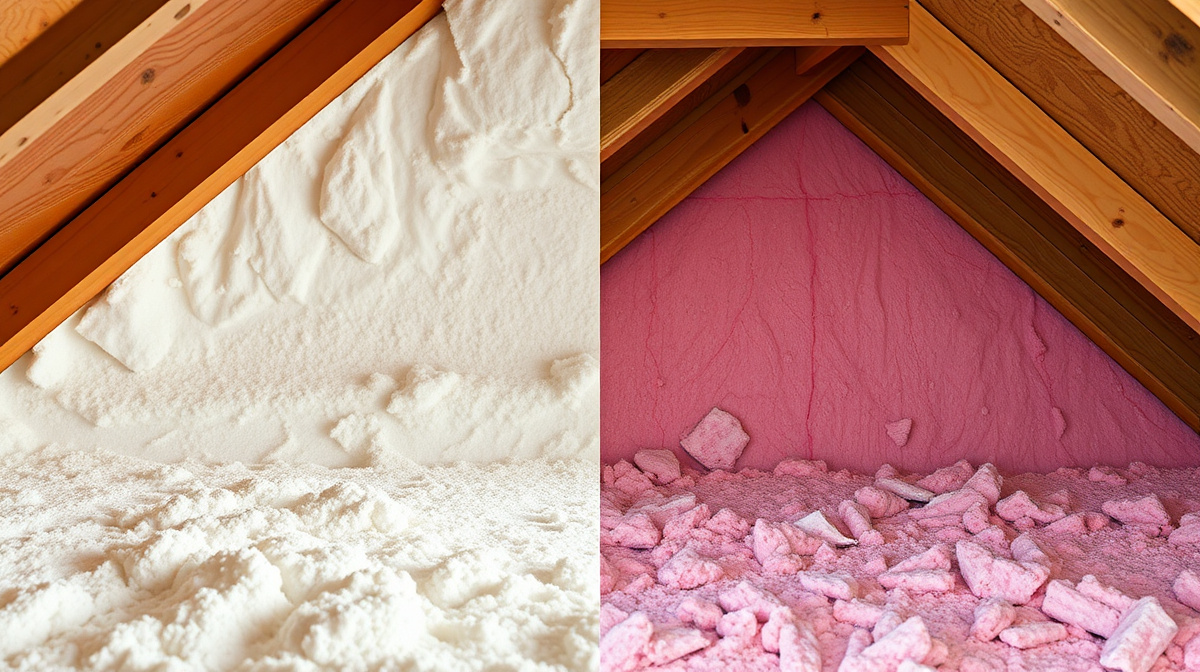
Open-cell spray foam is the lighter, softer of the two spray foam types, with a typical R-value of roughly R-3.5 to R-3.7 per inch. Because it's less dense and uses less material to fill a given cavity, it commonly runs on the lower end of the spray foam price range — often somewhere in the neighborhood of $0.90 to $2.50 per board foot, or roughly $1.00 to $3.00 per square foot for a typical application depth, though pricing varies by region and project scope. It's a popular choice for interior wall cavities and attic applications where sound dampening and cost-efficiency matter more than moisture resistance.
Closed-cell spray foam
Closed-cell spray foam is denser, rigid once cured, and delivers a notably higher R-value per inch — typically in the range of R-6 to R-7. It also adds structural rigidity and acts as a vapor retarder, which makes it the preferred choice for crawl spaces, rim joists, and roof-deck applications where moisture control matters. That extra performance comes at a higher price, commonly landing somewhere around $1.50 to $5.00 per square foot depending on application thickness and project scope, with larger and more complex jobs trending toward the higher end of that range.
Blown-in insulation (cellulose or fiberglass)
Blown-in insulation is typically the most budget-friendly option for topping up or filling an attic floor. It commonly runs somewhere around $1.00 to $2.50 per square foot installed, varying with material choice, depth needed, and attic accessibility. It doesn't air-seal the way spray foam does, so it's often paired with a separate air-sealing pass for the best results.
Batt and roll insulation (fiberglass or mineral wool)
Batts are generally the lowest cost per square foot of any common insulation material, often in the range of $0.50 to $1.50 per square foot installed for standard fiberglass, with mineral wool running somewhat higher. Batts are best suited to open wall cavities in new construction, additions, and remodels, and their real-world performance depends heavily on installation quality — a snug, gap-free fit is what actually delivers the rated R-value; compressed or gapped batts commonly underperform their labeled rating.
Cost by room or area of the home
Total project cost obviously depends heavily on square footage, but it's worth looking at typical per-project ranges for the jobs homeowners ask about most, since these numbers account for realistic access and depth requirements rather than a flat per-square-foot multiplication.
- Attic (open-cell or blown-in, average home): commonly around $1,500 to $4,500 depending on square footage and whether old insulation needs removal first.
- Attic roof deck (closed-cell, creating a sealed/unvented attic): commonly around $4,000 to $12,000+ for a full attic, reflecting the higher material cost and the larger roof-deck area treated rather than just the floor.
- Crawl space (closed-cell on walls and rim joists): commonly around $1,500 to $5,000, depending on square footage, height/access, and whether encapsulation work is bundled in.
- Garage ceiling or walls: commonly around $800 to $2,500 for a typical two-car garage, depending on foam type and whether it's a ceiling-only or ceiling-plus-walls scope.
- Rim joists only (a common targeted, lower-cost project): commonly around $500 to $1,500 for an average home's perimeter.
- Whole-home new construction (walls, attic, and rim joists together): can commonly range from roughly $4,000 for a small home up to $15,000 or more for a large home, depending heavily on square footage and foam type mix.
Notice that a full roof-deck closed-cell job costs meaningfully more than a floor-only attic job — that's not upselling, it's simply more surface area and more material. A good contractor will walk you through which approach actually makes sense for your home rather than defaulting to the more expensive option.
Ways to reduce your total project cost
A higher price tag isn't always the right project, and a lower one isn't always a shortcut. There are legitimate ways to bring your total cost down without sacrificing performance where it actually matters:
- Target the areas with the biggest impact first — for most homes, that's the attic, since it's typically responsible for a large share of total heat gain and loss. A phased approach that tackles the attic now and a crawl space or garage later can spread cost over time without losing the biggest win.
- Mix materials strategically — use closed-cell spray foam only where its moisture resistance and higher R-value per inch genuinely matter (rim joists, crawl space walls, roof decks), and a more economical material like blown-in or batt elsewhere.
- Bundle projects in a single visit — combining an attic top-up with a crawl space or garage job in the same appointment commonly costs less per square foot than scheduling them as separate visits, since it spreads the mobilization and minimum-fee cost across more work.
- Ask about financing — many insulation contractors, including us, offer financing options that spread the cost of a larger project over monthly payments, which can make a full-home upgrade more manageable than paying the entire cost upfront.
- Capture every available incentive — checking your utility provider's current rebate offerings and confirming your eligibility for the federal tax credit before the work starts (rather than after) ensures you don't leave savings on the table.
- Get more than one estimate — pricing varies by contractor even within the same market, and a second opinion also gives you a chance to compare what's actually included (removal, air sealing, cleanup) rather than just the bottom-line number.
The most expensive mistake homeowners make isn't overspending on foam type — it's skipping air sealing to save a little money upfront, then not getting the performance they expected from the insulation itself. If your budget is tight, it's usually smarter to scale back the square footage or phase the project than to skip air sealing on the area you do insulate.
Minimum job fees
Because spray foam rigs require mobilizing equipment, mixing chemical components, and a minimum crew, most spray foam contractors — including us — have a minimum job fee that applies even to very small projects. This is standard across the industry and typically covers the cost of getting a truck, technician, and equipment on-site regardless of square footage. Minimum fees commonly range from roughly $500 to $1,500 depending on the contractor and region. If you only need a small area sprayed — say, a single rim joist section or a small closet — ask upfront whether a minimum fee applies and whether it makes sense to bundle in another small area of the house to get more value out of the trip.
DIY vs. professional installation
DIY spray foam kits are widely available and marketed as a lower-cost alternative to hiring a professional crew — and on paper, the material cost looks appealing. A typical DIY kit commonly runs somewhere around $300 to $600 for a few hundred board feet of material, which sounds like a bargain compared to professional pricing.
In practice, the comparison isn't quite that simple. Professional-grade spray foam requires the two chemical components to be mixed at the correct ratio, applied at the correct thickness in the correct number of passes, and sprayed onto a substrate within the right temperature and humidity range to cure properly. DIY kits use simplified, lower-pressure equipment that's genuinely useful for small gap-filling and minor projects, but it typically cannot achieve the same density, application consistency, or R-value performance as professionally applied foam at any real scale. Homeowners who attempt larger DIY spray foam projects commonly report uneven application, under-cured foam, and results that fall meaningfully short of the R-value they expected — problems that are difficult and expensive to correct after the fact.
The practical takeaway: DIY kits can make sense for small, contained gap-sealing tasks (sealing a rim joist section, filling gaps around a window or door). For any project covering a meaningful area of your home — a full attic, a crawl space, a garage — professional installation is generally the better value once you account for application quality, cure performance, and the fact that a botched DIY job often has to be removed and redone by a professional anyway, adding cost rather than saving it.
Factors that move your price up or down
Two homes of similar size can land on very different final numbers. Here's what typically drives the difference:
- Home size and total square footage — the most obvious factor, since more area means more material and labor.
- Accessibility — a cramped crawl space, a low-clearance attic, or tight wall cavities take longer to work in and commonly add cost compared to an easily accessible space.
- Target R-value and application depth — reaching a higher R-value target requires a thicker application, which means more material.
- Removal of old insulation — if existing insulation is wet, compressed, contaminated, or otherwise needs to come out before new foam goes in, that's an added line item.
- Foam type — open-cell is typically less expensive per square foot than closed-cell, given the density and material difference.
- Regional labor rates and travel — pricing varies by local market and how far a crew has to travel to reach your home.
- Seasonal demand — like many trades, spray foam contractors can see busier and slower seasons, which occasionally affects scheduling and, in some markets, pricing.
- Project bundling — combining an attic project with a crawl space or garage project in the same visit commonly costs less per square foot than scheduling them separately.
Rebates and the federal tax credit
Insulation upgrades are one of the more commonly incentivized home improvements, though the specifics vary by location and change over time, so treat this section as a starting point for your own research rather than a guarantee.
Many utility companies offer rebates for insulation upgrades as part of broader energy-efficiency programs, since reducing a home's heating and cooling load also reduces strain on the electric grid. Availability, amounts, and eligibility requirements differ by utility provider and are updated on their own schedules — the right move is to check directly with your local utility provider to see what's currently available in your area before you assume a specific dollar amount.
Separately, the federal Energy Efficient Home Improvement Credit — commonly referred to by its tax code section, 25C — has historically provided a tax credit for qualifying insulation and air-sealing materials in an existing home. As of now, it can cover a portion of material costs up to an annual limit for building envelope improvements. Because tax credit programs, limits, and qualifying-product rules can change from year to year, we'd rather be straightforward with you than quote a number that might be outdated: confirm current eligibility, qualifying products, and exact credit amounts with a qualified tax professional before you count on a specific figure in your project budget.
The practical takeaway is simple — it's worth checking both your utility provider and a tax professional before finalizing your budget, since a rebate or credit can meaningfully change your net cost, but neither should be assumed until confirmed for your specific situation.
Sample cost scenarios (illustrative only)
To make all of this concrete, here are a few illustrative scenarios based on the ranges above. These are examples to help you picture how the pieces come together — not quotes for your home.
- A 1,200 sq ft attic topped up with open-cell spray foam, no removal needed: commonly in the range of $1,800 to $3,600.
- A 1,000 sq ft crawl space encapsulated with closed-cell foam on walls and rim joists: commonly in the range of $2,500 to $4,500.
- A two-car garage ceiling sprayed with closed-cell foam: commonly in the range of $1,000 to $2,200.
- A 2,000 sq ft home's full attic roof deck converted to a sealed, unvented assembly with closed-cell foam: commonly in the range of $7,000 to $14,000.
- A small rim-joist-only job, likely to hit a minimum job fee: commonly in the range of $500 to $1,200.
How to get an accurate quote
Every range in this guide exists to help you understand the landscape and budget realistically — but the only way to know what your project will actually cost is to have it assessed. A good estimate should include your square footage, current insulation condition, the R-value target for your climate and goals, any removal work needed, and a clear breakdown of material and labor rather than a single lump number. Ask any contractor you're considering to walk you through those line items so you can compare quotes apples-to-apples.
We build every quote around your actual home, not a generic per-square-foot rate, and we'll tell you plainly if a lower-cost material makes more sense for your project than the higher-end option. Call 844-967-5247 for a free, no-pressure estimate, or request a quote online and we'll follow up with next steps.
Frequently asked questions
Open-cell spray foam commonly runs around $1.00 to $3.00 per square foot, while closed-cell spray foam commonly runs around $1.50 to $5.00 per square foot, depending on application thickness, project scope, and region. These are general ranges — an on-site estimate will give you an exact number for your home.
Yes. Most spray foam contractors, including us, charge a minimum job fee — commonly in the range of $500 to $1,500 — to cover mobilizing equipment and crew regardless of square footage. If you only need a small area done, ask whether bundling in another small project makes sense to get more value from the visit.
The kit itself is cheaper upfront, commonly $300 to $600, but DIY kits typically can't match the application consistency, cure quality, or R-value performance of professional application at any real scale. For anything beyond small gap-sealing tasks, professional installation is usually the better value once you account for performance and the cost of fixing an uneven DIY job later.
Possibly. Many utility companies offer rebates for insulation upgrades — check with your local provider for current programs. Separately, the federal Energy Efficient Home Improvement Credit (25C) has historically applied to qualifying insulation work, though amounts and eligibility change, so confirm current details with a tax professional before budgeting around a specific figure.
Ready for a free quote?
Tell us about your home and we'll build a clear quote — rebates included.